A strong foundation will ensure that the structure of the house will last for many years. A smart foundation will ensure that the house stays cool during the day and minimizes heat release at night.
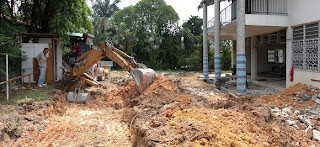

Pic 1a and 1b: Excavation begins to prepare the ground for the foundation.
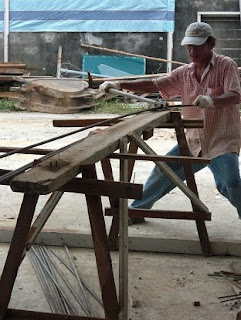

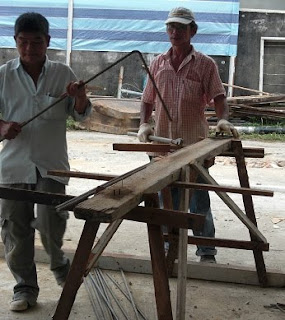

Pic 2a - 2d: Steel rebars are bent into shape by hand to construct the reinforced steel framework for the new pillar footings.
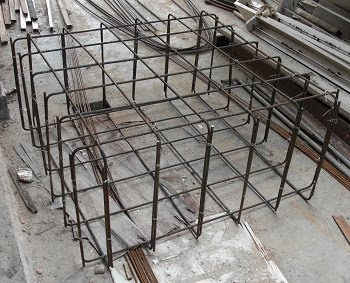
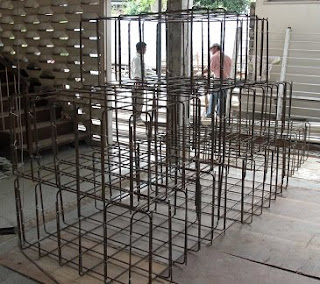
Pic 3a and 3b: The completed reinforced steel framework for the pillar footings.

Pic 4: Positioning of the wooden formworks. Note the house's exposed cornerstone pillar that needs to be reinforced as well.

Pic 5: Close-up photo of the cornerstone pillar. Note the thin footing base of approx. 6 inches deep only.

Pic 6: Using a mechanical agitator to remove any air bubles trapped in the concrete mix.

Pic 7: The concrete footings in various stages of setting. Note the mechanical agitator in the foreground.
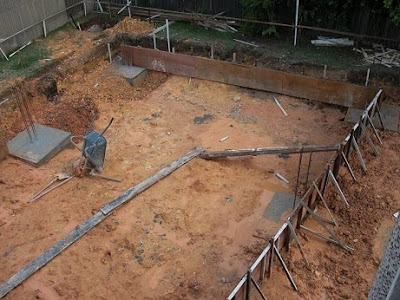
Pic 8: Levelling the ground and setting up the wooden formworks for the ground beams.


Pic 1a and 1b: Excavation begins to prepare the ground for the foundation.


Pic 2a - 2d: Steel rebars are bent into shape by hand to construct the reinforced steel framework for the new pillar footings.


Pic 3a and 3b: The completed reinforced steel framework for the pillar footings.

Pic 4: Positioning of the wooden formworks. Note the house's exposed cornerstone pillar that needs to be reinforced as well.

Pic 5: Close-up photo of the cornerstone pillar. Note the thin footing base of approx. 6 inches deep only.

Pic 6: Using a mechanical agitator to remove any air bubles trapped in the concrete mix.

Pic 7: The concrete footings in various stages of setting. Note the mechanical agitator in the foreground.

Pic 8: Levelling the ground and setting up the wooden formworks for the ground beams.

Pic 9: Carefully arranging the recycled tyres within the marked space. Three layers of tyres will be used for the internal floors.

Pic 10: Three layers of recycled tyres completely filling up the foundation with provisions for the ground beams.

Pic 11: Straping the tyres in place using a steel strap tensioner. Note the reinforced wire mesh (BRC) encasing the tyres.

Pic 12: White corrugated plastic sheets are used to form gullys for the ground beams as well as to encase the tyres prior to pouring concrete.

Pic 13: After more than 10 days of hard work, it was finally time to pour the concrete. And it had to be completed in a single pouring even if it meant working overtime.

Pic 14: Finally, it is done!...and now to move on to another section of the house to repeat the whole process...


